Update on #Projectpool

It is time for a photo onslaught to update you on the progress that’s happening in our backyard. It is getting really exciting! And now that the weather has turned into real summer-like weather we’re getting really anxious to get the liner in the pool and get it filled up.

Late last summer before the new grass had re-grown after #projectpatio our backyard was looking like this:

IMG_20160804_174611

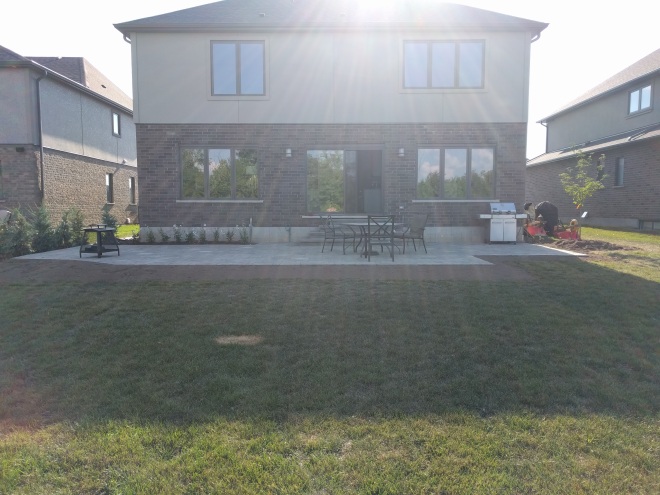
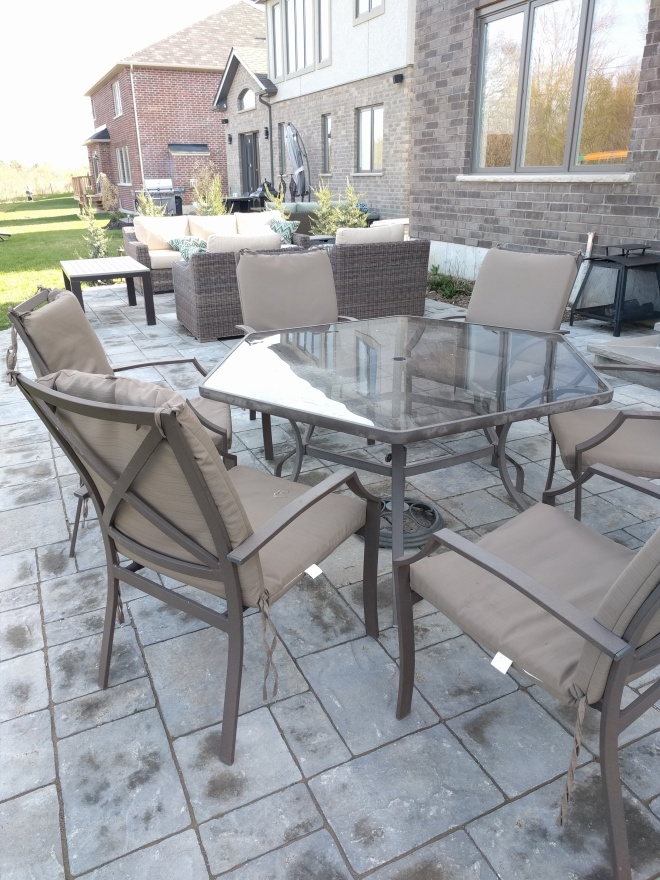
We didn’t have much patio furniture to fill it out but boy did we love it! So much room… and access to the backyard via those stone steps. We were out there constantly and it allowed us to extend our use of the backyard much later into the fall. We also added a conversation set to the patio – which you can see in the next photo. We opted for the Brandemore set and ordered it through Costco.ca.

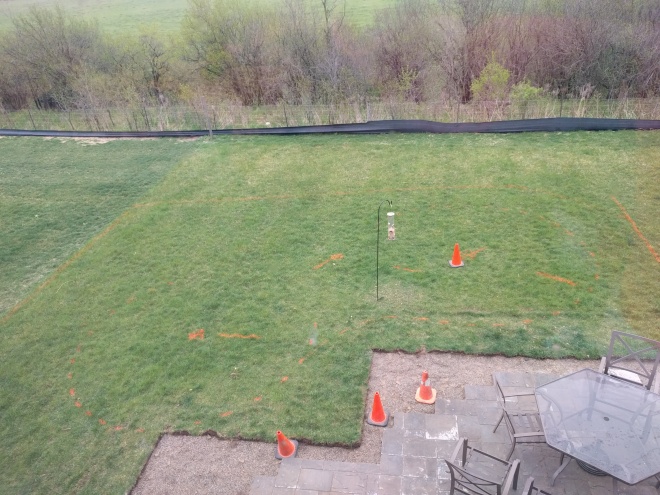
Let’s take a walk not so far down memory lane to earlier this spring to see what we were working with.

IMG_20170426_172116

A sure sign that work was about to start. Never been so excited about orange spray paint before!

IMG_20170430_190711

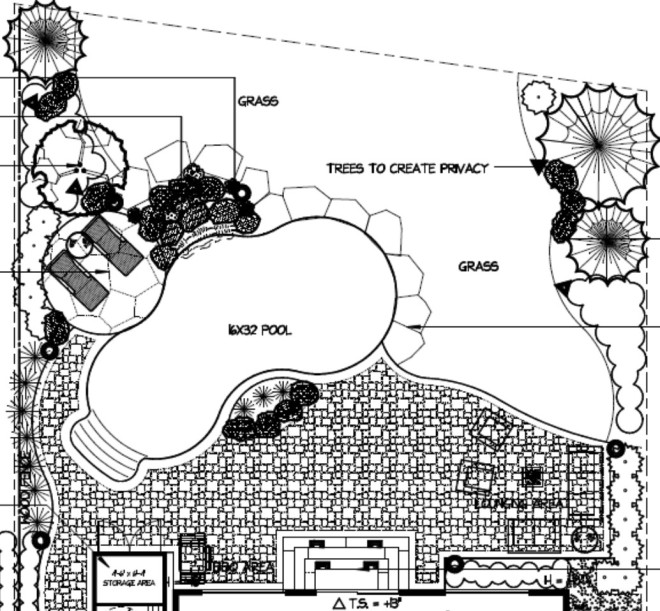
The first thing to go in was the pool. Once the pool was dug and installed (mostly) then the landscaping could begin. So, right on schedule the “pool guys” showed up and went to work.

IMG_20170507_140257

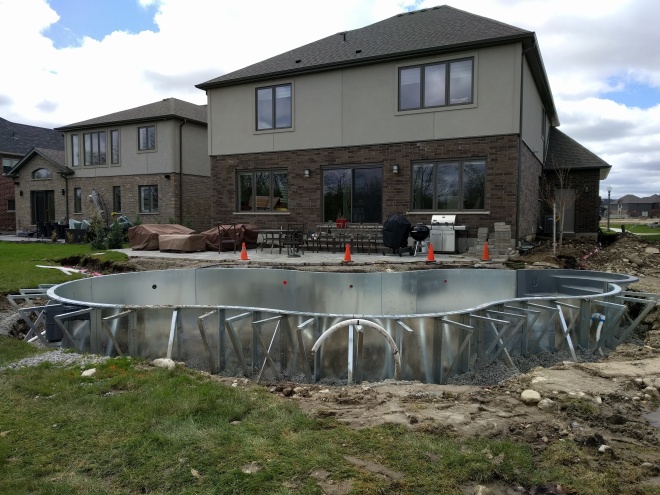
The pool went in so efficiently. We were so impressed with how quickly they dug the pool and then put it together. In only a couple of days it looked like this. After about a week, they had pretty much wrapped up their end of things, with a promise to be back when the major stone work was complete and heavy equipment had done their job.

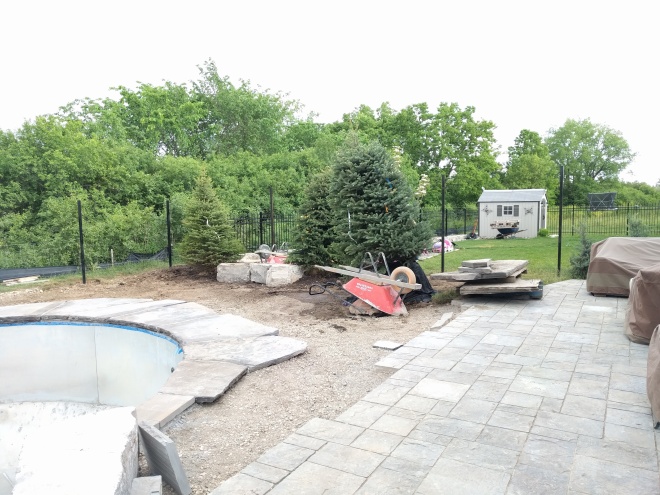
We had a wet spring this year, though, so that set back the landscaping team a little bit. So our pool sat like this for a couple of weeks without any other action in the backyard.

IMG_20170523_200548

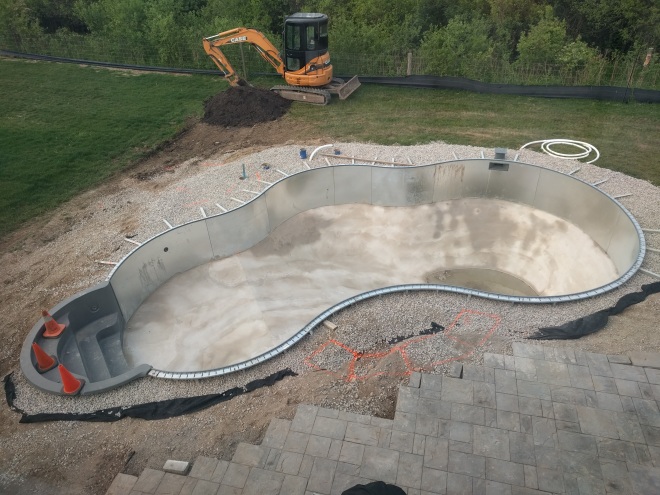
Once the landscaping team arrived, though we started to see big changes immediately.

IMG_20170528_175531

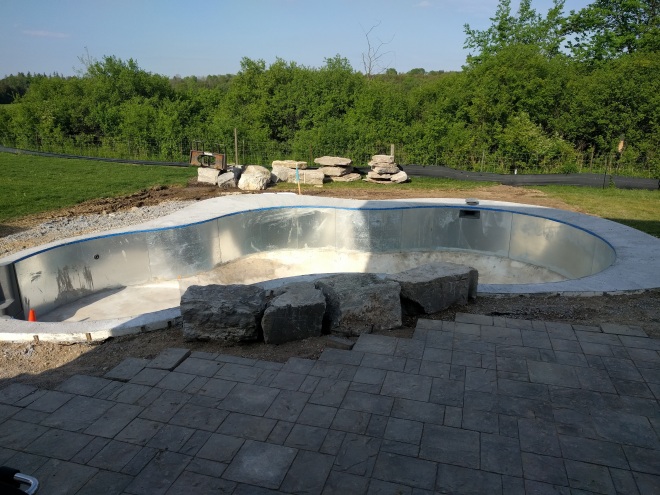
Big armour stone on site and lots of flagstone on site to be placed. The pool surround had the concrete poured so that the pool coping could be set in place.

IMG_20170601_174452

Then the water feature started to take shape and a lot of the heavy lifting with the skid steer. It was amazing to watch the painstakingly detailed work that takes a lot of effort. The large rocks were moved sometimes 3 or more times just to get them in the right spot, in the right shape, and then into final position after mortar had been placed.

IMG_20170609_175308

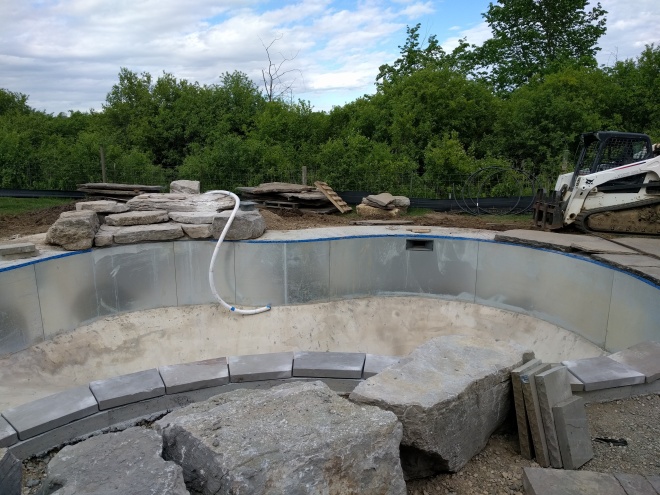
If you’re following #projectpool on instagram, you might’ve seen my giddy post about some of the large trees showing up on site. You’ll also see in the photo above that the fence posts were starting to go in.

IMG_20170614_195904

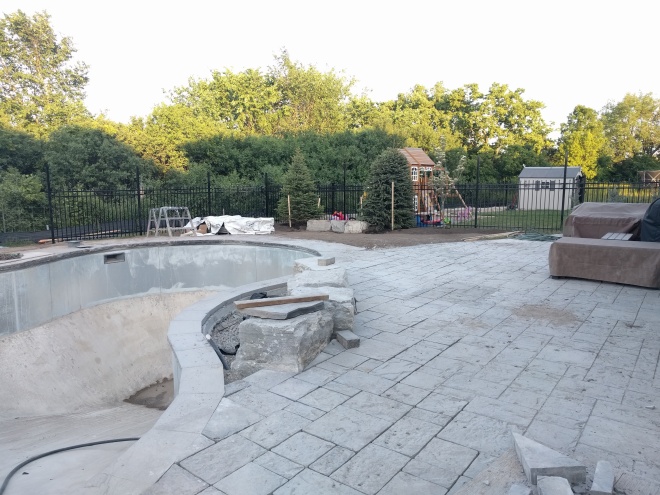
More fence progress and some extended patio work. That just about takes us to the end of last week and things were really starting to come together.

We’re getting pretty close and can almost see the finish line now!

Hoping to be swimming to celebrate Canada’s 150th birthday.

What are you planning for Canada’s big day?

Boys’ rooms update and big news!

Last I shared, the boys’ rooms were on the docket for painting… and indeed they were painted. While they had a great time at my parent’s house over March Break (see below) I painted their rooms in what I dubbed “the least dramatic before and after project” since the rooms basically look the same only *slightly* more shiny.

Grandmas Rules

And while they were enjoying Grandma’s house rules, I also did a bit more shopping and indeed the design gods were with me on my trip to HomeSense and I found a pair of panels for Harrison’s room. I’m planning to add some blackout lining so that these summer months are a bit easier on us at bedtime.

We now wait for the paint to cure, in order to put a few things up on the walls – like the decals I have saved for Foster’s room. Once some of the more interesting changes have happened to their rooms, I’ll post photos of the progress.

BUT… I also promised some big news so here it is:

WE ARE PUTTING IN A POOL! (Yes, that required All Caps)

I’m calling it #projectpool so you can follow along on instagram. This week we hit a major milestone because the digging has begun.

After months of planning – seriously we started planning in October – it is finally time to see the plans come together.

Phase two of our yard projects that we planned for last year (catch up on Phase One in New Nest  – Exterior Tour), includes an in-ground pool, the required fence for said pool, the patio/hardscaping around the pool and extending the existing patio, a pool shed, a walkway from the front of the house around the side to the back, and adding some gardens and/or plants. Whew!

Pool

That’s a lot to take in, but that image does show the left side of the house that’ll be part of the plan this summer. We’re going to share part of the path to the back with our neighbours so we can each have a nice wide path until our fences, rather than two skinny ones separated by another skinny patch of grass. It pays to be friendly with your neighbours!

Here’s a closer look at the backyard area.

Pool3

The pool will be right off the patio area, leaving us a patch of grass that we can still use to throw a ball around in.

We decided to ditch the hot tub altogether, since we didn’t think we would use it much. And although we thought this project might take on 3 or more phases, the addition of the pool required a bunch of other “stuff” to be done, like putting in the fence to meet by-law and safety requirements, and the shed (more of a “want” so we can store pool-related items), it made sense to do all the rest of the plan at once. So phase 2 will be the end of the major yardwork we have done. I’m sure the yard will continue to evolve though as our family grows.

I can’t tell you how excited I am to see this starting to come together.

Foster and digger

Someone else is pretty excited too!

Harrison’s Room – The Plan

Well it is March Break and the boys are at Nana and Poppa’s for a week of fun, so it is about time that I show you what I have in store for their rooms while they’re away.

Foster’s room will end up looking a lot like  Harrison’s “big boy” room in our previous house, with a few additions, and obviously a different shape and size. So let’s talk about Harrison’s room.

As I mentioned in the last post, I had found bedding for Harrison’s room and it was on sale at The Bay (now on clearance!)so I snagged it up while I could. He’s really into hockey right now, so I’m going to try to incorporate that into the room with some temporary and/or inexpensive accents and I’m planning a pretty neutral palette in the hopes that the room will be able to grow with him for a long time.

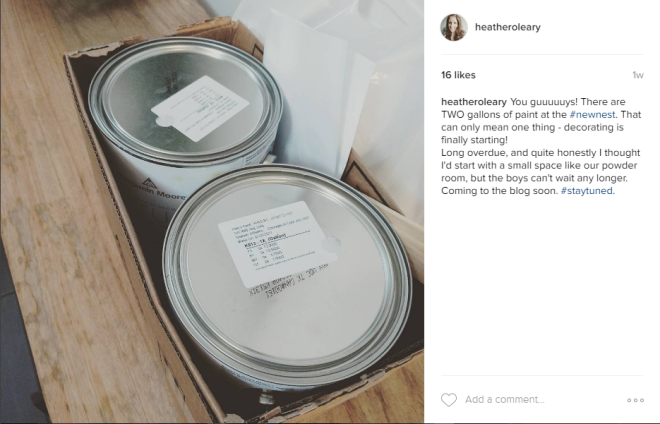
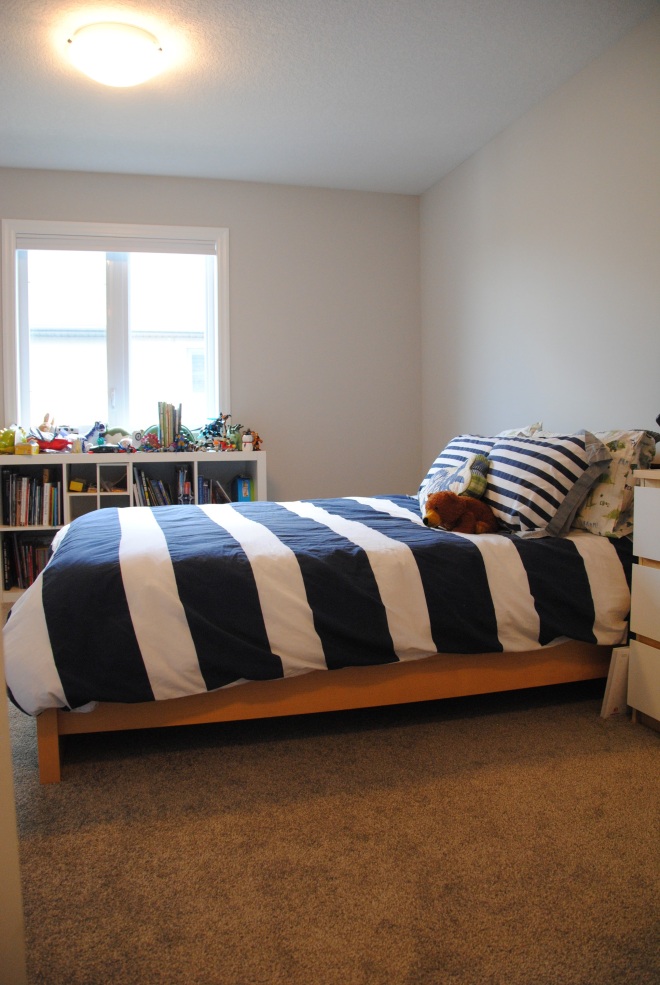
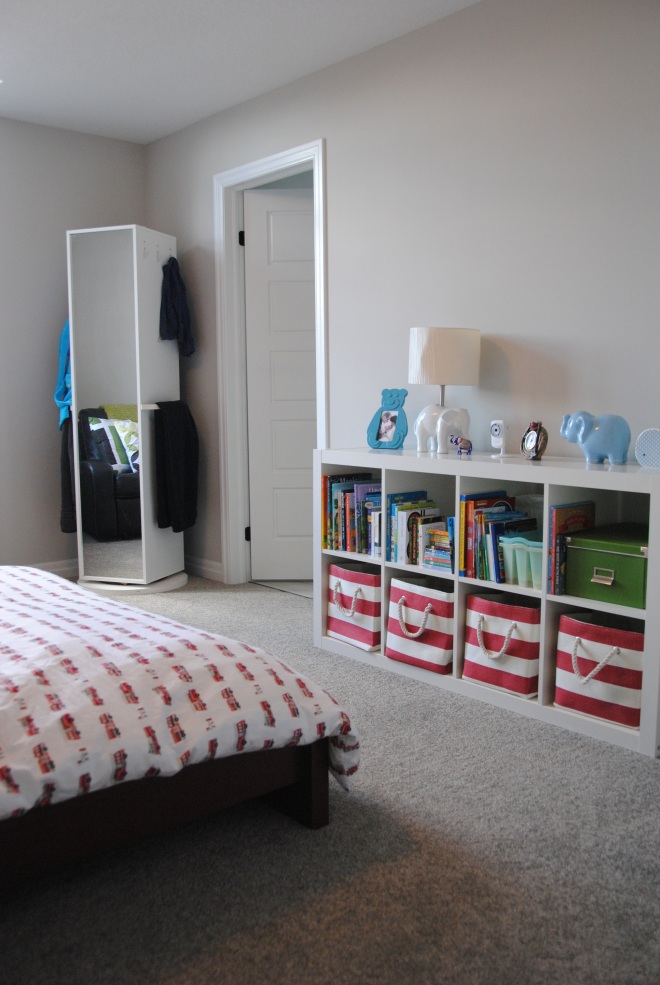
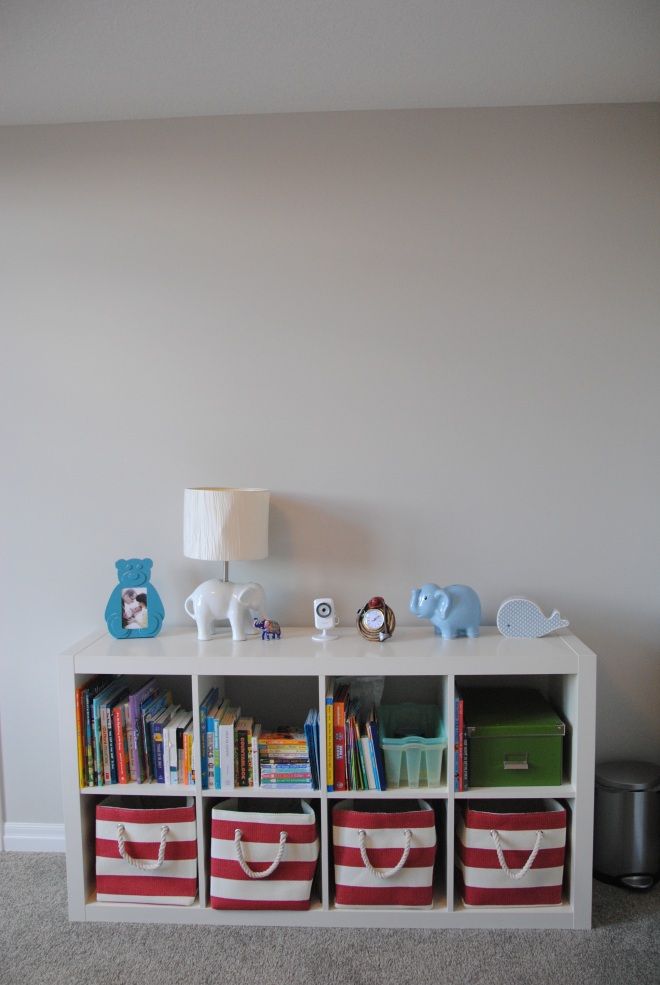
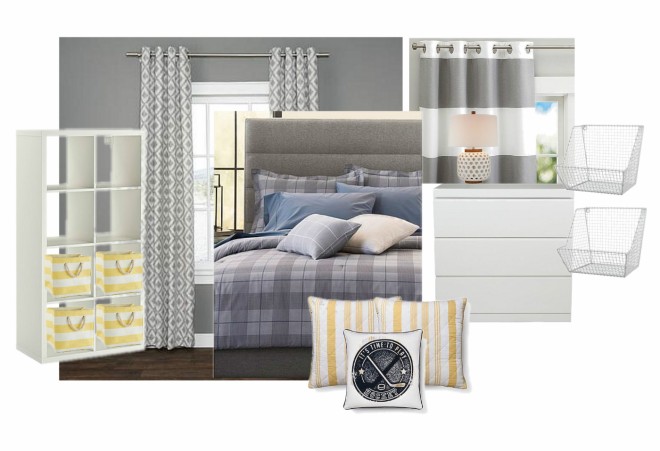
Curtains have been a sticking point for me. As you can see, there’s two options on the board above. I really like the rugby stripe because I think it’ll keep the room looking youthful, but those ones are from Pottery Barn Kids and are $109 USD per panel! I was hoping to find something at a lower price point. The other option I found at Urban Barn and they’re a bit more formal and grown-up and still also $79 per panel. So… I continue to hunt for a bargain. Maybe the decor gods will be with me when I hit up HomeSense.

I ordered the Stripes around the Cube Bins in yellow from Land of Nod and am not-so patiently awaiting their arrival. I have ordered these before in different colours and they fit perfectly in the Ikea Kallax (and formerly Expedit) shelving that has a home in each of the boys’ rooms. The hockey pillow is from Target.

A while back I picked up some white wire shelves/bins that I found at HomeSense to begin to corral some of the books/paper that is now coming into Harrison’s room from school. I think that’ll be great for beside his bed.

The first step is to paint the rooms in an eggshell finish (which I talked about back here), so that we can start to put furniture back, hang curtains and put art and decor on the wall and un-boring the rooms once and for all!

I have one lingering design/function question for all of you. I was thinking about putting a desk in Harrison’s room. What do you think? Do your school-aged kids have a desk in their room? Or do they do work/homework elsewhere in the house? Do you think a desk in a bedroom would just capture clutter? Let me know what you would do.


Boys’ Rooms Tour

After a long hiatus I’m back! If you follow me on Instagram, you might’ve seen this post:

instagram-paint-cans

In which I teased about a little bit of decorating that is ready to happen at the new nest. I also mentioned that I figured when painting eventually started at the new nest, I would be starting with small space like the powder room. But the boys have been talking about how “boring” their rooms are. Actually, they’ve told me how boring the whole house is. #brutallyhonest. And although we tried to make sure that their rooms seemed like home from Day One in the new nest (with success I think), I would tend to agree that its about time to give their rooms a bit of a personality boost.

To date all we’d really done in the boys’ rooms is install window coverings which were much needed for privacy and light management. And part of the delay in decorating was by design. I didn’t really want to be putting holes in the wall for shelves, prints etc. when I knew I’d be painting soon. But, I didn’t want to paint until we’d been in the house at least a year because the house would shift, and nail pops would happen etc.

There was never any doubt that I was going to paint the house eventually. The whole house was painted in flat paint. Its a bit of a nightmare for scuffs and dings (and fingerprints… ahem). And November of last year marked one whole year in the new nest for us, but of course, the holidays were upon us and I wasn’t ready to DIY or paint anything in December.

Harry's room 1

Harry’s room was pretty much a clone of what he had at the old house. Same bed, same bedding, same dresser and shelves. A bit more space to work with and some really cool angles in his room.

dsc_0078

Harry's room 3

Harry's room 4

And although he had talked about wanting some changes to his room, he was chugging along rather happily with his room. But what really got this project going was Foster’s emerging, ongoing, undying love affair with dinosaurs, in which he wants to steal all of Harrison’s “stuff” and have a dinosaur room to call his own.

Foster dino

So for me this had a simple solution, swap out most of the dinosaur themed items from Harrison’s room and put them into Foster’s room and a few other things to personalize it for Foster. This also meant convincing Harrison to “let go” of those items and “sell” him on a new room. Luckily it didn’t take much persuading as he’s growing up too and could understand the idea of his brother loving dinosaurs more than he does now. It didn’t hurt that I told him he’d be getting new stuff and he could help me plan some of the items.

Meanwhile, Foster’s room had undergone some transformation since our move-in day. We moved him into a nursery.

Foster's nursery

Then he outgrew the crib (quickly!) which prompted a mini update to the room including firetruck bedding and a few accessories.

dsc_0070

I figured red would be the colour that gave some continuity to the room once I was ready to actually decorate, but then he threw us a curve ball with this dinosaur stuff (although we should’ve seen it coming) and he declared that he didn’t want a red/firetruck room at all. He wanted dinosaurs!

So his room is currently a mix between firetrucks and his nursery. There’s red and green and blue, and his elephant lamp, and his animal banks… Fosters room 2

… and his nursery chair, and the ottoman,

Fosters room 5

Fosters room 3

but it is pretty clear that his walls are bare.

Fosters room 4

Isn’t it amazing how you can see things so clearly in photos that you miss in real life?

So, what’s next?

Well the paint is purchased and painting is definitely the first step. I decided that I’d keep the paint colour as it is, but give it another coat in eggshell finish to make it a bit more durable for the boys’ rooms. That’s easier for me – probably fewer coats – and also allows me to add colour and personality to the room in other ways. And hey! if Foster decides that he doesn’t like dinosaurs any more, I don’t have to worry about having a strange paint colour on the walls to work around. (Not that he’d get another makeover any time soon).

The boys are headed to my mom and dad’s for March Break this year, so I think that’s when most of the painting will get done. It turns out that when we’re home the boys are mostly in their rooms/sleeping so it is hard to disrupt their space and make it function for every day.

I’ve already purchased some new bedding for Harrison’s room, and I have some thoughts on how that room is going to turn out and the colour palette I want to use. I talked him out of a Pokemon room. #momwin

We have some dinosaur items that we’ve received as gifts over the years that never quite made it to Harrison’s room (this one or the old one) so I’m hoping to use those in Foster’s space.

I also had purchased some fabric for Harrison’s blue room, which never got used so I’m hoping to find a way to incorporate that into Foster’s room, as well as phasing out the nursery items by selling them on our neighbourhood buy and sell or on kijiji.

What are you up to?

New Nest House Tour – Second Floor

It’s time for Part Two of the tour of the new house. Come on up!

Foyer and Stairs

From the top of the stairs there’s a hallway to the right that leads to all the bedrooms on the 2nd floor.

hallway

The closed double doors you see above lead to the walk-in linen closet. At the very top of the stairs on the right (the partial door you see above on the right) leads to our guest bedroom.

Guest Room

A guest bedroom was high on our list of “wants” when searching for and then planning our new house. Since all of our family live out of town, we wanted to have a space for them when they come to visit (hint-hint). We have already put this room to good use and it has been so nice to offer our friends and family who visit, a place of their own in our home. (I hope they enjoyed it too!) And we don’t have to offer them blow up mattresses in make-shift “bedrooms” any more.

Guest Room Ensuite

The guest room also has its own ensuite – again to give our guests a space of their own when visiting. No need to subject them to the boys’ bad aim, or the ring of dirt they seem to leave in the bathtub every.single.time.

Next up I’ll show you around what I’ve been calling “boy zone”.

boy zone 1

Open door leading into Harry’s room. Closed door leads into Foster’s room.

boy zone 2

Door to Foster’s room.

boy zone 3

Looking out of “boy zone” into the hallway towards the guest bedroom.

When we were first planning the house I thought this space was kind of wasted, but based on the design plan the space couldn’t really be attributed to either boy’s room or it would make the doorways extremely awkward. Our builder also pointed out that this division helps to give some separation to “boy zone” (the bedrooms) and will help with sound dampening as well. And now that we have it, I really love it. I think it’s unique and gives our boys a little extra shared space, and I have so many ideas about how we’re going to make this area special and functional for the boys.

Foster's Room

Foster’s room is the one at the front of the house and it gets beautiful sunlight in the afternoon and evening. The door you see above leads from Foster’s room into the boys’ shared bathroom.

Boy's Bathroom

From each bedroom the boys enter into this common sink area. I really wanted to do something fun and special for the boys’ bathroom so we opted for the green cabinets, and a single trough sink with two faucets. I LOVE how it turned out. (Also the door you see above leads into Harry’s room and is the only peek into his room that we have from before the move).

Boy's Shower Room

From the sink area, the boys then have a tub/toilet area that can be closed off from the sink area. Which I think will be really great as they get older and want some privacy. The separation will allow them to both use different parts of the bathroom at once.

Master Bedroom

And our master bedroom is at the back of the house and our large window makes use of our great views. We often see deer out in the field behind our house in the mornings or at dusk and the sunrises are incredible. If you were standing at the window looking out and turned right you could see into our master ensuite.

Master Bathroom

We decided to go with classic white for the cabinets and the countertops are a white quartz with just a hint of sparkle to give it a bit of elegance. We also upgraded to a kitchen height cabinet in our bathroom instead of standard height since both husbandman and I are relatively tall. It was well worth it.

Master Bathroom Shower

Our walk-in shower is insanely large. What else can I say?

Master Bathroom Tub

And this tub is just awesome. It faces the window (the reflection of which you can see in the shower photo above, and the first bathroom photo) and it looks out on the field and the green space behind our yard. I specifically asked for the window to be large and low so that I could take advantage of the view while in the tub.

So there you have it! A tour of our 2nd floor four bedrooms and three bathrooms.

If you’re catching up, check out these posts: New Nest – The Plan, New Nest – Exterior Tour, New Nest House Tour – The Main Floor